| title | description | ms.custom | ms.date | ms.topic | helpviewer_keywords | ms.assetid | author | ms.author | manager | ms.technology | |||
|---|---|---|---|---|---|---|---|---|---|---|---|---|---|
|
Create and run a load test |
Learn how to create a load test that contains unit tests. You create and run load tests using Visual Studio Enterprise. |
SEO-VS-2020 |
10/01/2016 |
conceptual |
|
bbf075a5-96d5-48ed-a03c-330f0fc04748 |
mikejo5000 |
mikejo |
jmartens |
vs-ide-test |
Walkthrough: Create and run a load test that contains unit tests
[!INCLUDE Visual Studio]
In this walkthrough you create a load test that contains unit tests.
[!INCLUDE web-load-test-deprecated]
This walkthrough steps you through creating and then running a load test using Visual Studio Enterprise. A load test is a container of web performance tests and unit tests. You create load tests with the New Load Test Wizard.
A load test also exposes many run-time properties that can be modified to generate the desired load simulation. In this walkthrough, you use the New Load Test Wizard to add unit tests to a load test.
In this walkthrough, you will complete the following tasks:
-
Create a load test that uses unit tests.
-
Change some of the load test settings.
-
Run a load test.
-
Perform the steps in Walkthrough: Creating and running unit tests for managed code to create a simple C# class library that contains a web performance and load test project with some unit tests in it.
Create a load test containing unit tests using the New Load Test Wizard
To start the New Load Test Wizard
-
Make sure you have installed the Web performance and load testing tools component described in Create a load test project.
-
Open the Bank solution that you created in Walkthrough: Creating and running unit tests for managed code.
-
In Solution Explorer, open the shortcut menu for the Bank solution node, choose Add, and then choose New Project.
The Add New Project dialog box displays.
-
In the Add New Project dialog box, expand Visual C# and choose Test. From the list of templates, choose Web Performance and Load Test Project and in the Name field, type
BankLoadTest. Choose OK.The BankLoadTest web performance and load test project is added to the solution.
-
Open the shortcut menu for the new BankLoadTest web performance and load test project, choose Add, and then choose Load Test.
-
The New Load Test Wizard starts.
-
The Welcome page of the New Load Test Wizard is the first page.
-
Choose Next.
To edit settings for load test scenario
-
In the Enter a name for the load test scenario text box, type ScenarioSample.
A scenario is a grouping mechanism. It consists of a set of tests and the properties for running those tests under load.
-
Set the Time Profile Think to
Use normal distribution centered on recorded think times. Think times represent the time that a user would ponder a web page before going on to the next page. -
Choose Next when you are finished.
To edit load pattern setting for test scenario
-
Choose Step load.
[!NOTE]
You can choose from two types of load patterns: constant and step. Each type has its function in load testing, but for the purposes of this walkthrough choose Step load. -
Set Start user count to 10 users.
-
Set Step duration to 10 seconds.
-
Set Step user count to 10 users/step.
-
Set Maximum user count to 100 users.
-
Choose Next.
To select test mix model for the scenario
-
Under How should the test mix be modeled, select Based on the total number of test.
-
Choose Next.
To add unit tests to the scenario
-
The next step is to Add tests to a load test scenario and edit test mix.
-
Choose Add to select tests.
-
Choose the CreditTest unit tests listed in the Available Tests pane, which lists all the web performance tests and unit tests in the web performance and load test project.
-
Choose the arrow to add the CreditTest unit test to the Selected Tests pane.
-
Repeat steps 3 and 4 for the DebitTest and FreezeAccountTest unit tests.
-
When you have finished adding the three unit tests, choose OK.
You are presented with the test mix.
-
Move the slider under Distribution for the CreditTest slightly to the right to adjust the test distribution. Notice that the other sliders move to the left automatically so that the distribution remains at 100%.
-
Choose Next.
To select network mix for test scenario
-
Select the LAN connection type to add to the network bandwidth mix.
You can add more network types. Use the sliders to adjust the test distribution and weighting.
-
Choose Next.
To specify computers to monitor with counter sets during load test run
-
Choose Next.
For more information about the counter sets, see Specify the counter sets and threshold rules for computers in a load test.
To edit run setting for load test
-
Select Load test duration and then set Run Duration to 2 minutes in order to smoke test your load test.
When you build your load tests, it is a good practice to validate that everything is configured correctly and running as expected by running a short, light load test. This process is known as smoke testing.
-
Choose Finish. Your Load test is opened in the Load Test Editor.
Run the load test
After you have created the Load test, run it to view how your bank application responds to the load simulation. While a load test is running, you see the Load Test Analyzer window.
To run the load test
-
With a Load test open in the Load Test Editor, choose the green Run Test button in the toolbar. Your load test starts to run.
-
If your test simulation exceeds any thresholds, icons appear in the tree control nodes to indicate a threshold violation. Errors have a red circle overlay, warnings have a yellow triangle overlay. You can find a counter that exceeded the threshold and graph it by dragging the icon onto the graph. You can do this while the test is running.
See also
- Edit the test mix to specify which tests to include in a load test scenario
- Specify virtual network types
- Edit load test scenarios
- Edit load patterns to model virtual user activities
- Edit text mix models to specify the probability of a virtual user running a test
Load test your application by using Visual Studio Team Services
This article shows how to use Microsoft Visual Studio load test features to stress test an application. It uses an Azure Service Fabric stateful service back end and a stateless service web front end. The example application used here is an airplane location simulator. You provide an airplane ID, departure time, and destination. The application’s back end processes the requests, and the front end displays on a map the airplane that matches the criteria.
The following diagram illustrates the Service Fabric application that you’ll be testing.

Prerequisites
Before getting started, you need to do the following:
- Get a Visual Studio Team Services account. You can get one for free at Visual Studio Team Services.
- Get and install Visual Studio 2013 or Visual Studio 2015. This article uses Visual Studio 2015 Enterprise edition, but Visual Studio 2013 and other editions should work similarly.
- Deploy your application to a staging environment. See How to deploy applications to a remote cluster using Visual Studio for information about this.
- Understand your application’s usage pattern. This information is used to simulate the load pattern.
- Understand the goal for your load testing. This helps you interpret and analyze the load test results.
Create and run the Web Performance and Load Test project
Create a Web Performance and Load Test project
-
Open Visual Studio 2015. Choose File > New > Project on the menu bar to open the New Project dialog box.
-
Expand the Visual C# node and choose Test > Web Performance and Load Test project. Give the project a name and then choose the OK button.

You should see a new Web Performance and Load Test project in Solution Explorer.


Record a web performance test
-
Open the .webtest project.
-
Choose the Add Recording icon to start a recording session in your browser.
-
Browse to the Service Fabric application. The recording panel should show the web requests.
-
Perform a sequence of actions that you expect the users to perform. These actions are used as a pattern to generate the load.
-
When you’re done, choose the Stop button to stop recording.
The .webtest project in Visual Studio should have captured a series of requests. Dynamic parameters are replaced automatically. At this point, you can delete any extra, repeated dependency requests that are not part of your test scenario.
-
Save the project and then choose the Run Test command to run the web performance test locally and make sure everything works correctly.


Parameterize the web performance test
You can parameterize the web performance test by converting it to a coded web performance test and then editing the code. As an alternative, you can bind the web performance test to a data list so that the test iterates through the data. See Generate and run a coded web performance test for details about how to convert the web performance test to a coded test. See Add a data source to a web performance test for information about how to bind data to a web performance test.
For this example, we’ll convert the web performance test to a coded test so you can replace the airplane ID with a generated GUID and add more requests to send flights to different locations.
Create a load test project
A load test project is composed of one or more scenarios described by the web performance test and unit test, along with additional specified load test settings. The following steps show how to create a load test project:
-
On the shortcut menu of your Web Performance and Load Test project, choose Add > Load Test. In the Load Test wizard, choose the Next button to configure the test settings.
-
In the Load Pattern section, choose whether you want a constant user load or a step load, which starts with a few users and increases the users over time.
If you have a good estimate of the amount of user load and want to see how the current system performs, choose Constant Load. If your goal is to learn whether the system performs consistently under various loads, choose Step Load.
-
In the Test Mix section, choose the Add button and then select the test that you want to include in the load test. You can use the Distribution column to specify the percentage of total tests run for each test.
-
In the Run Settings section, specify the load test duration.
[AZURE.NOTE] The Test Iterations option is available only when you run a load test locally using Visual Studio.
-
In the Location section of Run Settings, specify the location where load test requests are generated. The wizard may prompt you to log in to your Team Services account. Log in and then choose a geographic location. When you’re done, choose the Finish button.
-
After the load test is created, open the .loadtest project and choose the current run setting, such as Run Settings > Run Settings1 [Active]. This opens the run settings in the Properties window.
-
In the Results section of the Run Settings properties window, the Timing Details Storage setting should have None as its default value. Change this value to All Individual Details to get more information on the load test results. See Load Testing for more information on how to connect to Visual Studio Team Services and run a load test.
Run the load test by using Visual Studio Team Services
Choose the Run Load Test command to start the test run.

View and analyze the load test results
As the load test progresses, the performance information is graphed. You should see something similar to the following graph.

-
Choose the Download report link near the top of the page. After the report is downloaded, choose the View report button.
On the Graph tab you can see graphs for various performance counters. On the Summary tab, the overall test results appear. The Tables tab shows the total number of passed and failed load tests.
-
Choose the number links on the Test > Failed and the Errors > Count columns to see error details.
The Detail tab shows virtual user and test scenario information for failed requests. This data can be useful if the load test includes multiple scenarios.
See Analyzing Load Test Results in the Graphs View of the Load Test Analyzer for more information on viewing load test results.
Automate your load test
Visual Studio Team Services Load Test provides APIs to help you manage load tests and analyze results in a Team Services account. See Cloud Load Testing Rest APIs for more information.
Next steps
- Monitoring and diagnosing services in a local machine development setup
Load test your application by using Visual Studio Team Services
This article shows how to use Microsoft Visual Studio load test features to stress test an application. It uses an Azure Service Fabric stateful service back end and a stateless service web front end. The example application used here is an airplane location simulator. You provide an airplane ID, departure time, and destination. The application’s back end processes the requests, and the front end displays on a map the airplane that matches the criteria.
The following diagram illustrates the Service Fabric application that you’ll be testing.
Prerequisites
Before getting started, you need to do the following:
- Get a Visual Studio Team Services account. You can get one for free at Visual Studio Team Services.
- Get and install Visual Studio 2013 or Visual Studio 2015. This article uses Visual Studio 2015 Enterprise edition, but Visual Studio 2013 and other editions should work similarly.
- Deploy your application to a staging environment. See How to deploy applications to a remote cluster using Visual Studio for information about this.
- Understand your application’s usage pattern. This information is used to simulate the load pattern.
- Understand the goal for your load testing. This helps you interpret and analyze the load test results.
Create and run the Web Performance and Load Test project
Create a Web Performance and Load Test project
-
Open Visual Studio 2015. Choose File > New > Project on the menu bar to open the New Project dialog box.
-
Expand the Visual C# node and choose Test > Web Performance and Load Test project. Give the project a name and then choose the OK button.
You should see a new Web Performance and Load Test project in Solution Explorer.
Record a web performance test
-
Open the .webtest project.
-
Choose the Add Recording icon to start a recording session in your browser.
-
Browse to the Service Fabric application. The recording panel should show the web requests.
-
Perform a sequence of actions that you expect the users to perform. These actions are used as a pattern to generate the load.
-
When you’re done, choose the Stop button to stop recording.
The .webtest project in Visual Studio should have captured a series of requests. Dynamic parameters are replaced automatically. At this point, you can delete any extra, repeated dependency requests that are not part of your test scenario.
-
Save the project and then choose the Run Test command to run the web performance test locally and make sure everything works correctly.
Parameterize the web performance test
You can parameterize the web performance test by converting it to a coded web performance test and then editing the code. As an alternative, you can bind the web performance test to a data list so that the test iterates through the data. See Generate and run a coded web performance test for details about how to convert the web performance test to a coded test. See Add a data source to a web performance test for information about how to bind data to a web performance test.
For this example, we’ll convert the web performance test to a coded test so you can replace the airplane ID with a generated GUID and add more requests to send flights to different locations.
Create a load test project
A load test project is composed of one or more scenarios described by the web performance test and unit test, along with additional specified load test settings. The following steps show how to create a load test project:
-
On the shortcut menu of your Web Performance and Load Test project, choose Add > Load Test. In the Load Test wizard, choose the Next button to configure the test settings.
-
In the Load Pattern section, choose whether you want a constant user load or a step load, which starts with a few users and increases the users over time.
If you have a good estimate of the amount of user load and want to see how the current system performs, choose Constant Load. If your goal is to learn whether the system performs consistently under various loads, choose Step Load.
-
In the Test Mix section, choose the Add button and then select the test that you want to include in the load test. You can use the Distribution column to specify the percentage of total tests run for each test.
-
In the Run Settings section, specify the load test duration.
[AZURE.NOTE] The Test Iterations option is available only when you run a load test locally using Visual Studio.
-
In the Location section of Run Settings, specify the location where load test requests are generated. The wizard may prompt you to log in to your Team Services account. Log in and then choose a geographic location. When you’re done, choose the Finish button.
-
After the load test is created, open the .loadtest project and choose the current run setting, such as Run Settings > Run Settings1 [Active]. This opens the run settings in the Properties window.
-
In the Results section of the Run Settings properties window, the Timing Details Storage setting should have None as its default value. Change this value to All Individual Details to get more information on the load test results. See Load Testing for more information on how to connect to Visual Studio Team Services and run a load test.
Run the load test by using Visual Studio Team Services
Choose the Run Load Test command to start the test run.
View and analyze the load test results
As the load test progresses, the performance information is graphed. You should see something similar to the following graph.
-
Choose the Download report link near the top of the page. After the report is downloaded, choose the View report button.
On the Graph tab you can see graphs for various performance counters. On the Summary tab, the overall test results appear. The Tables tab shows the total number of passed and failed load tests.
-
Choose the number links on the Test > Failed and the Errors > Count columns to see error details.
The Detail tab shows virtual user and test scenario information for failed requests. This data can be useful if the load test includes multiple scenarios.
See Analyzing Load Test Results in the Graphs View of the Load Test Analyzer for more information on viewing load test results.
Automate your load test
Visual Studio Team Services Load Test provides APIs to help you manage load tests and analyze results in a Team Services account. See Cloud Load Testing Rest APIs for more information.
Next steps
- Monitoring and diagnosing services in a local machine development setup
 Всем доброго дня!
Недавно для одного из заказчиков проводил нагрузочное тестирование веб портала. Результат оказался достаточно неожиданным, веб сайт лег раньше, чем предполагалось:) Посему в данной статье хочу поделится опытом проведения нагрузочных тестов, используя инструмент Visual Studio и облачный сервис Visual Studio Team Services (бывший Visual Studio Online).
Зачем проводить нагрузочные тесты
Но прежде, чем мы начнем погружаться в технические детали, немного теории. Зачем вообще проводить нагрузочные тесты? Вопрос достаточно важный, и в зависимости от того, как вы на него отвечаете, выбирается та или иная стратегия тестирования нагрузки.
Во многих случаях нагрузочные тесты проводят для того, чтоб определить максимальное количество пользователей, которые могут обслуживаться на выбранном сервере. Соответственно, нагрузочные тесты проводят перед запуском продукта на продуктиве. Казалось бы, вроде ничего криминального… Но подобный подход не дает вам ответа на вопрос: а можно ли на данном сервере обслужить большее количество пользователей? Возможно, нужно немного оптимизировать код, и сервер сможет корректно обслуживать большее количество запросов?
Конечно, можно перед запуском проекта покопаться в коде, найти слабые места, попробовать поправить, но все же не самый эффективный способ оптимизации, так как отсутствуют адекватные метрики. Откуда вы знаете, что улучшения, которые вы сделали, достаточны, чтобы сказать: лучше это приложение работать не будет. Что такое «лучше»? Где эталон? Насколько далеко мы от него ушли?
Задавая эти вопросы, мы плавно переходим во второй подход проведения нагрузочных тестов. Нагрузочные тесты нужно проводить регулярно во время работы над проектом (например, в конце спринта). Причем начинать нужно с момента, когда у вас готов каркас. Результат проведения нагрузочного теста на эталонном сервере, куда вы публикуете каркас вашего приложения, — это и есть эталон. Дальнейшие измерения вам покажут изменения относительно эталона. И если изменения драматические, это повод провести дополнительные работы для оптимизации кода. Проще искать проблемы с производительностью на ранних этапах, нежели пытаться перелопатить весь проект в конце.
Оборудование для генерации нагрузки
Есть еще одна проблема проведения нагрузочных тестов. Это оборудование (сервера), которое будут генерить нагрузку. Проблема в том, что для проведения адекватных нагрузочных тестов рядом с эталонным сервером, приближенным по параметрам к боевому, нужно поставить такой же или лучше для генерации нагрузки. Более того, вы рискуете получить неадекватные результаты в том случае, если ваш боевой сервер торчит наружу по порту 80, а тестируете вы его используя локальную сеть организации, где стоит ваш генерирующий нагрузку сервер.
Попробуйте обосновать для службы закупок покупку сервера, который вы собираетесь использовать раз в 2 недели один-два часа. Очень часто в этом случае задействуют сервера, которые не используются (устаревшие), либо на время тушат какие-то приложения внутри организации, дабы задействовать высвободившиеся ресурсы под нагрузочные тесты (такой сценарий большая редкость, но на своем опыте видал и такое). В обеих вариантах есть свои недостатки. Наприем, не использующееся сервера могут либо списать, либо отключить для экономии электропитания, либо снять с поддержки и т.д. А процесс согласования прерывания работы какого-то приложения внутри организации — это ад для всех.
В общем, вы, наверное, поняли, на что я намекаю: надо использовать облачные ресурсы с оплатой по часам. На серверы нужно залить и настроить необходимый софт для генерации нагрузки (иногда это не тривиальная задача).
Тестирование с помощью Visual Studio Team Services
Я предлагаю для генерации нагрузки использовать Visual Studio Team Services (бывший Visual Studio Online). Итак, что нам надо:
— Аккаунт в Visual Studio Team Services. >Бесплатно его можно взять тут.
— Visual Studio Enterprise. Триальная версия тут.
Итак, приступим:
После того, как вы создали бесплатный аккаунт в Visual Studio Team Services, вам необходимо создать новый проект, указав название и систему контроля версий, которую вы будете использовать (для этой демонстрации не принципиально, какую выбирать):

После этого нам необходимо привязать созданный аккаунт к Visual Studio. Для этого в Team Explorer в Visual Studio нам нужно ввести параметры соединения к нашему проекту:


Также необходимо будет добавить нового пользователя в список аккаунтов Visual Studio и ввести пароль:

После соединения в окне «Connect to Team Foundation Server» отобразится список проектов. У нас он один, его и выбираем:

Далее создаем новый проект в Visual Studio. В разделе «Test» выбираем «Web performance and Load Test Project», задаем новое имя проекту:

После нажатия на кнопку «ОК» у нас появится новый проект веб теста. Собственно, сейчас наша задача записать этот веб тест. Для этого в нашем веб тесте жмем кнопку «Add recording»:

Откроется веб браузер. Все, что вы будете в нем делать, будет записано. Я просто зашел на главную страничку dou.ua, собственно ее и будем тестировать 

Возвращаемся в Visual Studio и жмем Stop recording:

Если после нажатия «Stop recording» ничего не поменялось (в веб тесте не появился записанный url с набором атрибутов), нужно включить аддон в веб браузере «Microsoft Web Test Recorder Helper»:

В итоге картина должна быть примерно такая:

Поудаляем лишнее:

Все, веб тест записан, теперь его нужно запустить из под нужного количества виртуальных пользователей. Для этого в наш проект Visual Studio добавляем Load Test. Клин по проекту нашего веб теста в Solution Explorer -> Add -> Load Test:

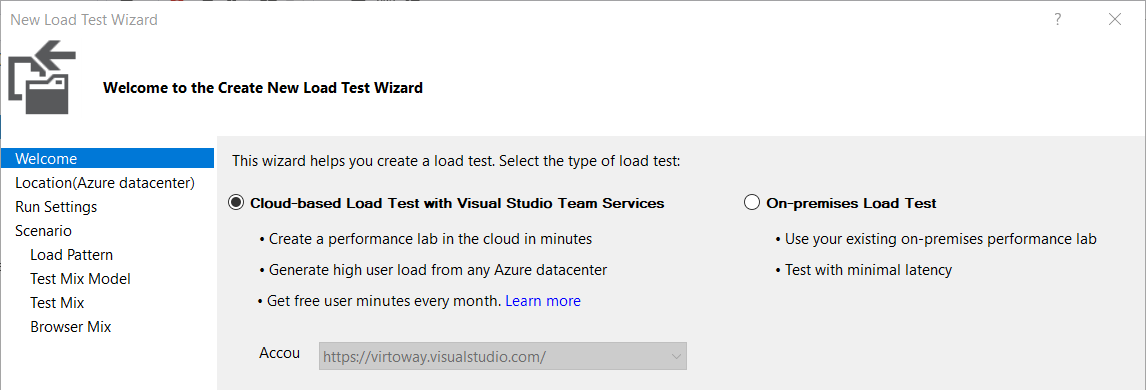
У нас откроется wizard, который нужно пройти. На первом шаге выбираем «Cloud-based Load Test with Visual Studio Team Services»:

Далее выбираем локацию дата центра, откуда будет генерироваться нагрузка:

Далее устанавливаем длительность теста:

После доходим до «Load Pattern». Выбираем «Step Load». Смысл тут в том, что есть стабильная нагрузка. Это значит, что нагрузка будет генерировать от заданного количества пользователей на протяжении теста.
Мы же выбираем более интересный сценарий, в камках которого количество одновременных пользователей будет постепенно возрастать по заданному шаблону:

Как вы догадались, мы нагрузим DOU тысячей одновременных пользователей.
Далее в Test Mix добавляем наш веб тест:

После этого можем сконфигурировать микс браузеров, после чего жмем Finish. Запускаем нагрузочный тест:

Пройдет какое-то время, и мы начнем видеть графики зависимости времени ответа от количества одновременных пользователей:

По окончанию теста можно загрузить в Visual Studio детальный отчет и посмотреть, что происходит. В данном конкретном случае увидел, что почти сразу начали валится ошибки. Вот статистика по всем ошибкам теста:

Интересными являются 503-е ошибки:

Прелесть в том, что мы можем проанализировать каждую запись отдельно:

Подозреваю, что это сработала защита веб сервера, так как с одного IP повалило куча запросов. При этом во время проведения теста я периодически рефрешил страничку у себя в браузере, все было ОК (помним, что нагрузка генерилась из облака).
Детальные отчеты вы можете выгрузить в Excel и проанализировать там. А если у вас есть предыдущие измерения, то Visual Studio умеет анализировать, насколько изменилась производительность с прошлого раза.
Это вкратце о нагрузочных тестах. В следующий раз планирую рассказать, как обнаружить виновных в деградации производительности вашего приложения.
По мотивам конференции MS QA Day решил создать пост о нагрузочном тестировании с помощью Visual Studio 2010.
Для многих тестировщиков наличие такой возможности становится откровением. Видимо, это связано с тем, что такая возможность предоставляется только с Ultimate редакцией.
Итак, перейдем к делу. В первую очередь выбираем Test — New Test. Перед нами открывается открывается следующее окно:

Выбираем тип LoadTest и видим, что наш тест может храниться в виде C#,C++ или VB проекта. Выбираем любой тип и продолжаем. Дальше нас поведет Wizard, во время прохождения шагов которого нам будет предложено установить Think Time между выполнением запросов, выбрать Load Pattern:

Сразу оговорюсь, что в Wizard’е представлены не все модели нагрузки. Самым необычным является шаблон нагрузки «Goal», при котором автоматически увеличивается или уменьшается число активных VUser’ов в зависимости от загрузки процессора целевой машины (сервера, на котором крутится тестируемое веб-приложение).
Затем Wizard предлагает выбрать Test Mix Model, то есть то, в каком порядке VUser’ы будут выполнять тестовые сценарии, которых может быть более одного.

На следующем шаге нам как раз и предлагается выбрать те сценарии, которые будут выполняться виртуальными пользователями. После этого мы можем выбрать подключения через какие сети мы будем эмулировать (а точнее — их пропускную способность).

Следующим шагом является выбор того, в каком процентном соотношении распределятся User Agent’ы отправляемых запросов.
Затем мы выбираем компьютеры, состояние которых будет мониториться. После установки всех параметров, мы наконец-то попадаем в созданный нами проект. Выглядит он так:

Тут можно снова изменить всё, что мы установили с помощью Wizard’а.
На этом, пожалуй, остановлюсь. Если тема интересна публике — в дальнейшем можно рассмотреть создание и запись конкретного сценария нагрузочного тестирования с помощью Test Manager, сбор и анализ метрик с нагружаемой машины, а можно и разобрать сценарий с msdn.
Спасибо за внимание!
Автор: shaddyk
Тестирование IT-систем, Тестирование веб-сервисов, Microsoft Azure, Блог компании Virto Commerce, Облачные сервисы
Рекомендация: подборка платных и бесплатных курсов дизайна интерьера — https://katalog-kursov.ru/
В данной статье мы поделимся собственным практическим опытом, который мы приобрели при тестировании Web Apps приложения (интернет-магазина), работающего в облаке MS Azure, а также опишем, какими инструментами мы пользовались для решения этой задачи и о выводах, которые были сделаны по полученным результатам.
Объект тестирования
В качестве объектов тестирования мы выбрали VirtoCommerce Storefront (web приложение, использующееся в качестве front end’a приложений, создаваемых на платформе VirtoCommerce).
Для получения реальной картины возможностей системы нам необходимо смоделировать запросы пользователей максимально приближенно к реальности. Нет смысла проверять главную страницу, которая может находиться в кэше и потом утверждать, что наша скорость составила 1k req/sec. Толку от такой метрики производительности в реальной жизни нет.
Поэтому для того, чтобы наши результаты тестирования были статистически значимы и максимально близко отражали показатели производительности на реальном трафике, было принято решение использовать запросы, максимально приближенные к реальному поведению пользователя в интернет-магазине.
Остановимся на следующих действиях, из которых будет состоять наш «реальный» тест:
|
Действие пользователя (тип теста)
|
Удельный процент от общего количества запросов
|
|
Просмотр уникальной страницы категории с ее продуктами
|
30%
|
|
Просмотр уникальной карточки продукта
|
40%
|
|
Добавления товара в корзину
|
10%
|
|
Поиск товаров по уникальной ключевой фразе либо атрибуту
|
20%
|
Рис. 1. Основные действия пользователей и их удельная частота использования.
Подготовка тестовых данных
Наиболее важная фаза для любого тестирования — это подготовка данных. Тестовые данные должны быть подобраны таким образом, чтобы как можно более полно соответствовать данным в реальной системе, как по количеству, так и по качеству (связи, структура и пр). По возможности общее количество данных должно быть достаточно для того, чтобы при тестировании как можно меньше было повторных обращений к одинаковым данным, что позволит избежать частого использования кэша и в результате получить самую пессимистичную картину производительности системы.
Основными данными для интернет-магазина, как правило, являются: каталог продуктов и категорий с ценами, скидки и сведения об остатках.
В качестве наполнения тестируемой среды использовались реальные данные каталога, которые будут использоваться на основной production-среде:

Рис.2. Данные, используемые для наполнения тестируемой системы.
Понятно, что для читателя, не знакомого со структурой каталога VirtoCommerce, некоторые типы данных могут ничего не значить, но тем не менее приведем их для того, чтобы хотя бы иметь представление о количественном порядке.
Подготовка проекта и запись тестов
В качестве основного инструмента для нагрузочного тестирования мы будем использовать MS Visual Studio Enterprise 2017 ( в других редакциях студии поддержка данного типа проектов может отсутствовать) и тип проекта Web Performance and Load Test Project.

Рис.3. Создание нового проекта.
После создания проекта нам необходимо будет создать тесты для каждого из ранее определенных пользовательский действий. Ограничимся созданием теста для одного пользовательского действия в качестве примера, поскольку остальные действия создаются по аналогии.
Для тестов мы будем использовать стандартный тип теста Web Performance Test, встроенный в Visual Studio.
Нашим первым тестом, который мы создадим, будет тест, открывающий детали продукта в интернет-магазине.
Для создания теста выберем из списка предложенных Studio тип теста “Web Performance Test», зададим имя “Storefront-ProductDetail “.

Рис.4. Выбор типа теста в Visual Studio.
Для данного типа теста Visual Studio сразу же попытается открыть браузер, где можно будет в интерактивном режиме прокликать необходимые действия непосредственно на сайте, но мы этого делать не будем, но сразу закроем браузер и остановим запись. В итоге мы получим пустой тест Storefront-ProductDetail.webtest.
Далее нам нужно добавить источник данных для данного теста, для того чтобы можно было использовать различные параметры запроса в рамках одного теста, для этого в VS Studio Web Performance Test предусмотрена такая возможность.
В качестве источника данных для нашего теста мы будем использовать таблицу в базе данных, где хранятся записи о продуктах. После этого у нас появится возможность использовать данные из подключенного источника в запросе, который должен открывать детали продукта на тестируемом приложении. Достигается это путем вставки конструкции “{{Имя источника данных.Название таблицы.Название колонки}}”
В итоге после всех манипуляций наш первый тест примет вот такой вид.

Рис. 5. Содержимое теста
Настало время для первого запуска, попытаемся запустить наш тест и убедиться, что он работает корректно.

Рис. 6. Результат работы единичного теста
По аналогии создадим тесты для все остальных наших сценариев.

Рис. 7. Результирующий набор тестов
После этого у нас практически все готово к созданию комбинированного теста, который будет эмулировать реальное поведение пользователя на сайте.
Для этого добавляем в наш проект новый LoadTest
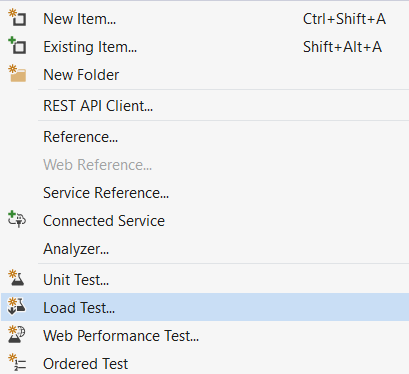
Рис.8. Создание нового load-теста
В появившемся мастере выбираем тип On-premises Load test.
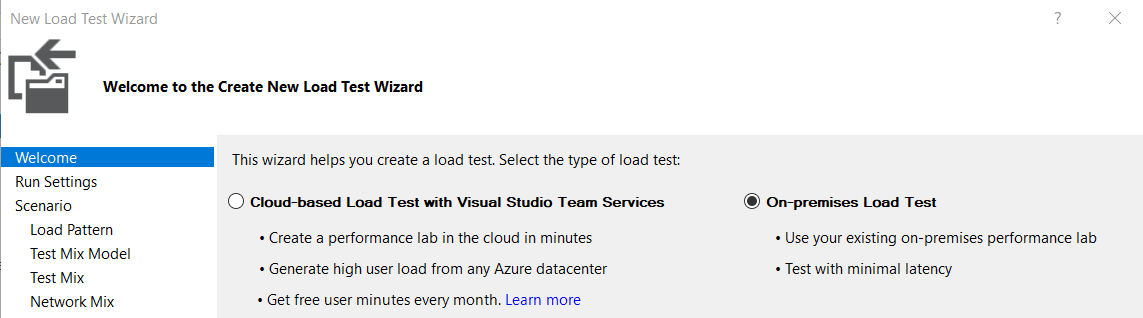
Рис. 9. Выбор типа теста
Этот пункт требует определённого разъяснения, ведь вы справедливо спросите: «Причем тут on-premise?» Тема статьи о тестировании с помощью Teams Services и MS Azure, но тут есть нюанс, так как мы для тестов используем источники данных в виде таблиц или других внешних сервисов, то с этим могут возникнуть определенные сложности, когда мы попытаемся запустить данный тест в облаке.
После тщетных попыток заставить работать такие тесты в облаке мы отказались от этой затеи и решили использовать для тестирования так называемые «записанные» тесты, которые получаются путем записи запросов, генерируемых тестами работающих локально и имеющих подключение к источникам данных.
Для записи тестов мы используем Fiddler, у которого есть возможность экспорта запросов в формат Visual Studio Web Tests. Немного далее мы расскажем более подробно про процедуру записи такого теста.
На последующих шагах выбираем продолжительность тестирования, количество пользователей и, самое главное — указываем, из каких тестов будет состоять наш MixedLoadTest и в каких пропорциях они будут использоваться.

Рис.10. Составляющие теста
В результате после всех действий мы получим комбинированный MixedLoadTest, настроенный для запуска для локально-развернутого приложения.
Далее нам необходимо запустить данный тест и попытаться записать с помощью Fiddler все запросы которые будут генерироваться в результате работы теста, а также получить “запись”, которую мы сможем запустить уже непосредственно в облаке.
Предварительно запускаем Fiddler и наш MixedLoadTest тест.

Рис. 11. Результат работы теста
После отработки всех данных получим вот такую картинку в Fiddler

Рис. 12. Сессия теста в Fiddler
Далее в Fiddler сохраняем все сессии в формате Visual Studio Web Tests, File -> Export sessions -> All sessions -> Visual Studio Web Tests и добавляем полученный файл в проект. Напомню, что данное действие необходимо для того, чтобы мы смогли получить тест без привязки к внешним источникам данных, так как с запуском такого рода тестов могут возникнуть проблемы в облачной среде.
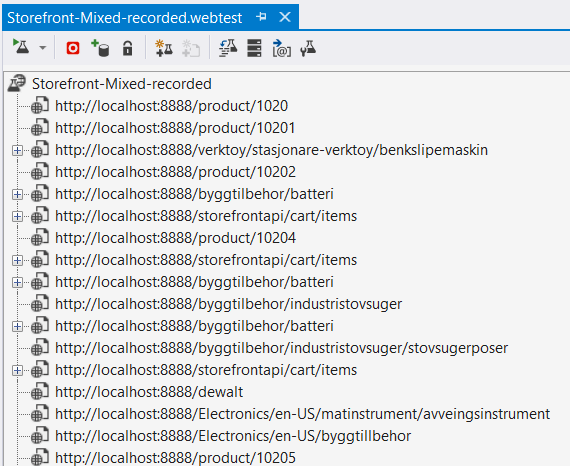
Рис. 13. Детали «записанного» теста
Теперь практически все готово для запуска нашего теста в облаке, последним шагом по подготовке теста нужно в любом текстовом редакторе открыть “записанный” MixedLoadTest и заменить в нем localhost:8888 (адрес прокси, Fiddler-а) на адрес нашего магазина в облаке.
Запуск теста в облаке
Для запуска тестов в облаке нам потребуется действующая учетная запись в Visual Studio Team Services.
Создаем новый LoadTest, только на этот раз выбираем Cloud-based Load Test with Visual Studio Team Services.
На следующих шагах выбираем дата-центр, с которого будет генерироваться трафик на тестируемый ресурс, а также максимальное количество агентов (пользователей) для константного паттерна, либо, если мы хотим использовать постепенное увеличение нагрузки, то необходимо задать соответствующие параметры.

На шаге выбора тестов, выбираем единственный тест, который мы записали ранее с помощью Fiddler, он и будет эмулировать «реальную» нагрузку на тестируемый ресурс.

После завершения создания запускаем тест, в процессе выполнения которого студия будет показывать некоторые ключевые метрики, такие как производительность и полоса пропускания, а также строить графики в реальном времени.

Рис. 14. Процесс работы теста в облаке
После завершения теста также можно посмотреть сохраненный веб отчет в VSTS:


Рис. 15. Web отчет на Visual Studio Team Services портале
Анализ результатов
Самый важный момент — это обработка и анализ полученных результатов теста. Для рассматриваемой задачи требовалось оценить производительность приложения, работающего на различных конфигурация Azure Web Apps B2 и B3 тарифах.
Для этого мы запускали “записанный” тест повторно для приложения на разных конфигурациях и фиксировали полученные результаты в Excel документе.
В итоге получился вот такой отчет:
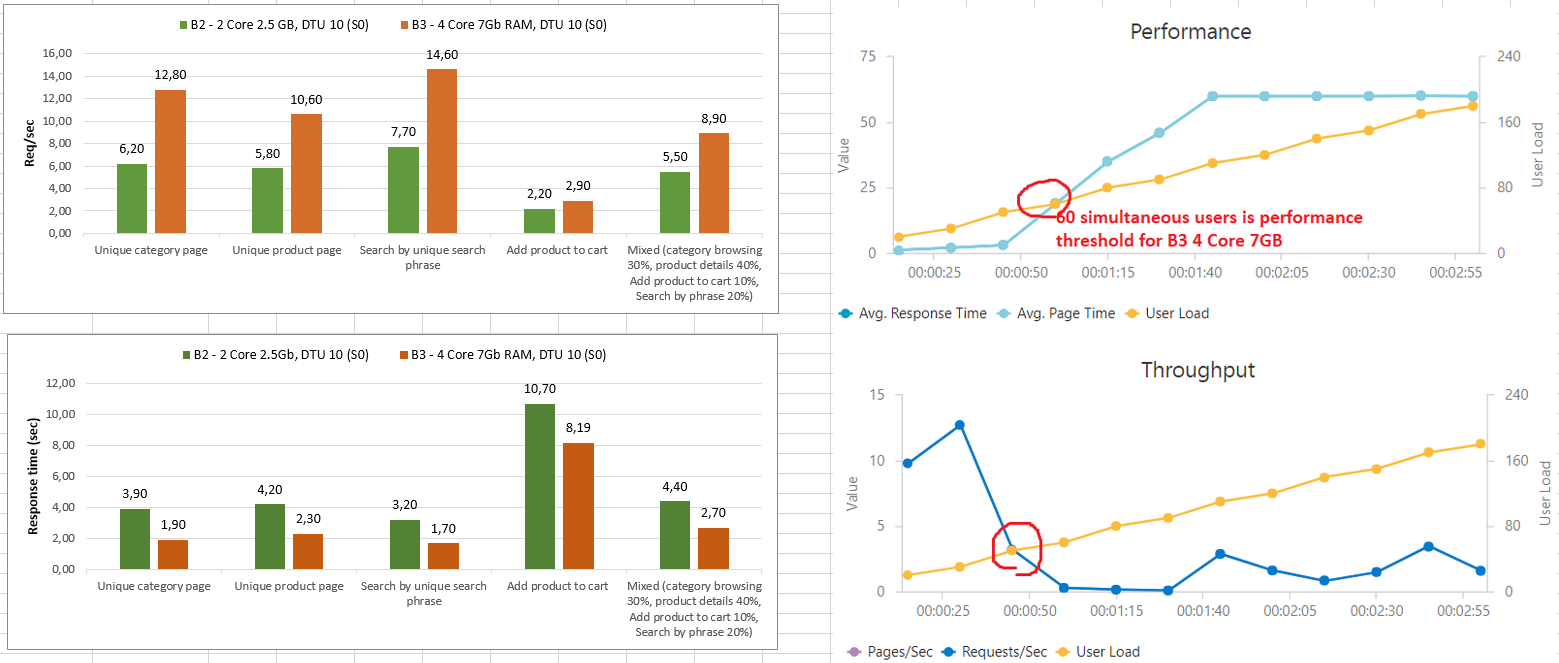
Рис.16. Результирующий отчет тестирования
Проанализировав полученные данные, удалось выяснить предельную нагрузку которое может выдержать наше приложение — она составляет около 60 одновременных пользователей или 9 запросов/сек. при среднем времени отдачи страницы 2.5 сек. На графике видно, что проблемы с производительностью начинаются резко после определённого порогового значения количества запросов.
Как позже выяснилось, причиной тому являлась 100% нагрузка на процессор, из-за того, что мы использовали стороннюю библиотеку для серверного рендеринга страниц, которая использовала регулярные выражения для токенизации и разбора разметки.
Выводы
Производительность активно развивающегося приложения всегда имеет очень сильную склонность к деградации, ведь любое, даже самое незначительное с точки зрения разработчика изменение, может привести к драматическим последствиям для производительности приложения. В этой связи периодическое тестирование производительности — важная процедура, которая должна проводиться регулярно и быть частью Continuous Integrations процессов.
Сам проект и отчеты полученные в результате тестирования доступны на GitHub.